Jupyer Lab in Docker
TL;DR
- Install Docker
- Open your terminal in the directory of your project
- Run this in your terminal:
docker run -it --rm -p 8888:8888 -v "$(pwd)":/home/jovyan/ jupyter/base-notebook:lab-2.2.5 - Open http://127.0.0.1:8888/lab
Why
If you work as a data scientist, you most likely use Python and Jupyter notebooks to run experiments and explore data. Also, you were already in a situation where your experiment worked “in your machine” but didn’t work for no one else. The famous “works on my machine”.

In this post, I want to propose Docker as a solution for you to handle your data science experiments more reliably and predictably. The perks of running data science experiments are more or less the same as the ones of using Docker for any other kind of software development problem, but they go more or less like this:
- No more “works on my machine.”
- Works on Linux, Mac, and windows (now even in Windows Linux Subsystem 2)
- No need to worry about global Python dependencies or install Python. There are thousands of different ways to install Python, and it’s hard to keep and manage different versions. With docker
- You start every time with a clean Python environment. There will be no unknown dependencies that you installed last year for a different project.
- If you use the right workflow, it forces you to keep track of your dependencies. Just make sure you delete your Docker container every time you stop working on it. Now you need to make sure you install all your dependencies at the beginning, or else the next time you launch your environment, you will be missing dependencies.
- Reproducible experiments
What is Docker
Docker is a tool that you can install on your computer and use it to manage Containers. To understand how Docker works, you just need to understand what is a Docker Container and a Docker Image.
- Container - The most straightforward way of thinking of a container is to treat it as a “virtual computer” inside your computer. It uses the same CPU and memory, but with its own (isolated) users, permissions, network, and file system.
- Image - It’s a package (imagine a zip) created by Docker with all the info necessary to run a Container that matches what you specified in a file called Dockerfile.
If you think of it in layers it goes more or less like this:
")
In short, you create a Dockerfile, then you use Docker to create a Docker image, and then you use that image to run a Docker container.
Also, here is an example of a simple Dockerfile that you can use to publish a Docker image to run a container with Jupyter.
|
|
If you want to create a Docker image, create a file called Dockerfile with the content above, then open on your terminal in the same directory as your file and run the following command to create the image:
|
|
Note that myjupyter:latest can be whatever you want, it is an identifier for that specific image.
To run a container with your image:
|
|
Let us go over the options we used on this Docker run and how they can be useful for you:
-it- Run the container in interactive mode. It’s useful for you to be able to do Ctrl+C and “gracefully” shut down your JupyterLab and docker.--rm- It deletes the running container when you exit. If you remove this when you exit Jupyter your container stops, and you can usedocker ps -ato see it, anddocker startto bring it back. For the sake of our workflow, I recommend that you always set the--rmfor the specific use case treated in this post.-v $(pwd):/workdir- With this, you can share the content of your current dir/project (which you can see by doingpwdon your terminal) with the Jupyter that is running inside the docker. A container has an isolated file system, remember? If you don’t do this, you will get to an empty directory.-p8888:9999- Make available in <localhost:9999> whatever is available inside my container on port 9999.
You can view all these options by running docker run --help (Warning: it can be overwhelming and at least for now, you don’t need most).
The last thing you need to know is what is a Docker registry. The Docker registry is where people publish their images for others to use. There are numerous registries, but the most famous one is https://hub.docker.com/.
You now know 20% of everything there is to know about Docker, and it should cover 80% of all the use cases you will ever have. For what is left, you know enough to use Google and find out.
Docker as part of DS loop
Now that you know about Docker, I would like to make a proposal where you make use of it, Jupyter Lab, and Conda to keep your environment reproducible and therefore also your experiments. While you don’t need to religiously follow all the steps I’ll show you in the next sections the entire time, following it for a while will give you the sensibility and the tools to make your data science workflow way more reproducible.
The organization responsible by Jupyter went to the trouble of creating a set of handy Docker images and published them to DockerHub, making it way more straightforward for the rest of us. They published a lot of different images that you can find available at https://hub.docker.com/u/jupyter/. There are images with varying levels of pre-installed packages. If you want to see the details about each check their docs: https://jupyter-docker-stacks.readthedocs.io/en/latest/using/selecting.html.
Running a clean Jupyter environment for your project is as simple as this:
|
|
And now open http://127.0.0.1:8888/lab.
Now you need to be aware that you added -rm when you lunched your docker. This means that your environment gets wiped whenever you decide to stop that Docker container. The way you can avoid this is by using conda to maintain all your dependencies in a file called environment.yaml that you update every time you add or remove a dependency.

Congratulations, you have your notebook.
Demo
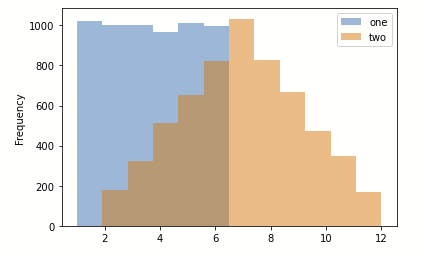
Let’s try a simple example where we are creating a histogram in Jupyter.
The following piece of code should generate the image below.
|
|
If you try to run this in your brand new Jupyter notebook, you will get and error right in the first line because the Pandas’ library is not installed.

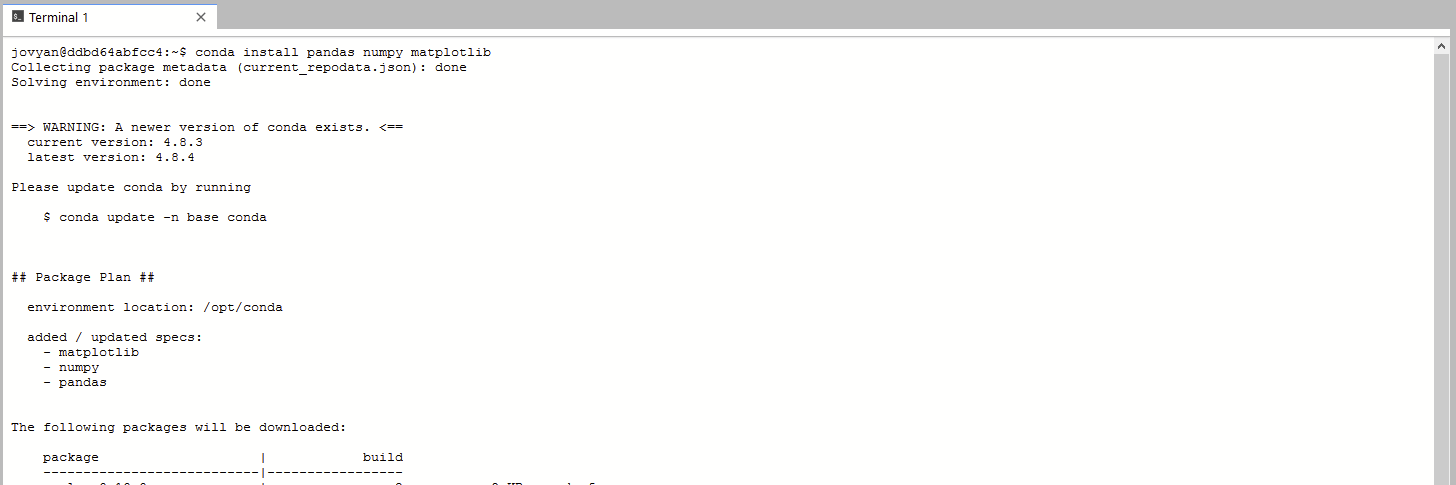
You can solve this simply by using Conda to install all the dependencies.
Place the following line in an empty cell in your notebook:
|
|
!, Jupyter will evaluate
whatever content you put next as if you were using a terminal. Think
of it like asking Jupyter to execute a command in the terminal.You should see an output like this:
Now that you updated your dependencies, you have to update your env.yaml file:
|
|
And next time you lunch your Docker container, go to the terminal and restore your environment using:
|
|
Final remarks
The Python ecosystem provides several ways to manage dependencies, but it’s usually not trivial to understand what is the best or the easiest way. In all honesty, I most likely just showed you one more, and you will find numerous more if you continue exploring.
Docker is a fantastic tool used in modern software development to guarantee isolation and reproducibility. Using it together with tools like Jupyter Lab and Conda, you can bring these characteristics to your data science explorations, and if necessary end up with a more solid and close to production-ready solution.